Tuesday, December 31, 2013

Gothic Gala Lacquers ~ Picard


Gothic Gala Lacquers ~ Picard
Deep pink leaning berry – linear holographic

It’s been more than four months since I wore my first Gothic Gala Lacquers. Back then Samantha had just started up her business with various glitter polishes. Let’s see how much has happened since back then, shall we?


They’re all holos and the first impression is that they’re all gorgeous!

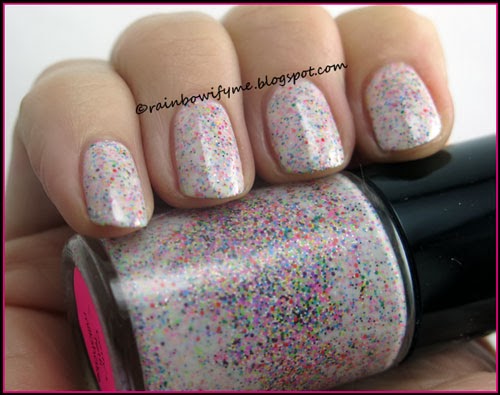
I wanted to give Picard a go first; a deep pink, almost berry coloured holo.

The formula is great, the polish glides on effortlessly and covers in two easy coats. Drying time between the coats is great. I used a regular basecoat, and didn’t experience any problems with dragging or the dreadful bald spots. And man… this is such a beautiful polish.

Let me show you what two coats and no topcoat look like on this picture taken with flash:


Is that pretty or what?? I’d say it is!


Picard is also pretty in lower lights and without a flash to make her show the rainbows. Take a look at this:


It’s almost even prettier than on the pictures taken with flash!!


This polish is so sweet that I had to give it a bit of edge – we are talking about a brand name that has the word “gothic” in it after all! So I stamped some cool skulls on it. I found the skulls on a stamping plate from Moyou London called “Biker Bollection-02” and I just stamped with a no name black stamping polish.

Final result with flash:


And without flash:


I have also got to show you this cute lollipop Sam sent me. I love it!!


I have to say that Samantha has really stepped up the indie polish ladder during the last four months! I really like(d) her glitters back then, and seriously, now - I love this first holo of hers that I’m trying on. Amazing formula, great coverage, beautiful polish. Polished thumbs up from me!

Opacity: 8/10
Colour, prettiness: 10/10
Durability: 9/10
Value for money: 10/10
Overall: 9/10
Buy again: Yes

Monday, December 30, 2013

Jindie Nails ~ Betty’s Fetti Milkshake


Jindie Nails ~ Betty’s Fetti Milkshake
White crelly with a large amount of micro-matte hexes in various colours

Today’s post is only going to be short. I ended up messing up my mani before I was even done! <pouts>

I started out with Betty’s Fetti Milkshake. It’s a polish I wouldn’t normally go for, but it was a part of a grab bag, and sometimes it’s nice to be pushed a bit outside the comfort zone.

The formula is fine, and the glitter spreads out evenly without any hassle. Pigmentation is good for a crelly, two coats is what it took to make this look cool.

The polish dries up bumpy because of the glitters. If you like textures you might even want to leave it like this:


You can see the glitters standing out on these pictures. I have two layers of Betty’s Fetti Milkshake on, and no topcoat.


I applied a layer of topcoat, and that’s what it took to even out the bumpiness:


I love the textured trend, but I must admit that I like this polish better with a topcoat.


And this is pretty much where my post ends. I had it lined up for a neat little tape experience, but the tape pulled the polish underneath off, despite the fact that I wore a fast drying topcoat. Grr! And I ran out of time, so I ripped the whole thing off, and went out with naked nails! I can’t remember when that happened last! Yikes!!


Opacity: 8/10
Colour, prettiness: 4/10
Durability: N/A/10
Value for money: 6/10
Overall: 6/10
Buy again: No

Sunday, December 29, 2013

NYX Advanced Salon Formula ~ Dark Glitter


NYX Advanced Salon Formula ~ Dark Glitter
Red glitters and hexagons in a blackened base

It’s been ages since I wore a NYX polish, so I figured that it was time. I chose “Dark Glitter”, which I remember buying a long time ago. I don’t know why it’s been sitting in my box of untrieds for so long.

Anyway – you can make this baby work on its own, but it does require at least three coats. I decided to layer it over black to make the red glitters pop more. This way you won’t get the same depth as you do when you use it on its own, but that’s ok for today. I started out with one layer of Essence “Black is Back”, my to go black crème polish. I haven’t taken a picture of that, because everybody should know what an ordinary black crème looks like! For anyone who doesn’t – it looks black, OK? :D

Then I applied two layers of “Dark Glitter”. It’s easy to apply and the glitters spread out effortlessly. No problems in the drying time department either. NYX is rather underrated as a brand, I think, because they do make really great polishes!

Anyway – a layer of Poshé topcoat finished the mani off – here’s the final result:


Black and red are two colours that go really well together in my opinion.


Two layers give some depth for sure. A third one would have made the glitters look like they were floating even more.


If you like black and red, then I do believe that you’ll like this polish!


One last picture:


I like this a lot! I actually think I’ll try and layer it over a dark burgundy next time, so the background isn’t “just” black.

What do you think about this? And do you like NYX as a rule, or not? 


Opacity: 6/10
Colour, prettiness: 6/10 (mainly because of its black base :))
Durability: 9/10
Value for money: 8/10
Overall: 7/10
Buy again: No

Saturday, December 28, 2013

Isadora Sugar Crush ~ Purple Crush & Pool Crush


Isadora Sugar Crush ~ Purple Crush & Pool Crush
Violet textured with glitter & Deep blue texture with shimmer

I love the textured trend, and I love that there are so many brands that produce them. Isadora joined the party and made a collection of cool textures, of which I’ve bought two so far. I only bought two because I think they’re a tad expensive. But I knew I wanted to use these two together!

The formula is good and the polish dries pretty fast. Coverage is good too. I painted my pinkie and my thumb blue and the three middle fingers violet. Then I taped my pointer and my ring finger down across the middle, and painted half of the nails blue too. And see what that looked like:


The pictures are taken in sunshine, and that made the glitter shine like crazy!


I like this, but I wasn’t quite finished.


I finished the mani by making three dots down the middle on each nail. I used another textured polish, namely Pastel’s Magic Sand #724. It’s a shocking pink with glitter, and I love it. I dotted twice on each dot to make it stand out more, and it turned out almost 3D! Here’s the final result:


I accidentally took this blurry pic. When I saw it I knew I had to post it, because I really like the way it looks!


That’s my textured Isadora polishes. Isadora is a Swedish brand that I really like. Quality is good and they make some pretty cool colours too. I’m not crazy about the price tag, but oh well.

What do you think of this?


Opacity: 9/10
Colour, prettiness: 7/10
Durability: 10/10
Value for money: 9/10
Overall: 8/10
Buy again: Yes

Friday, December 27, 2013

Dance Legend New Prism ~ #12 Android


Dance Legend New Prism ~ #12 Android
Seagreen strong linear holographic

Here’s another one of my Dance Legends, this time from the newer “New Prism”-collection – the collection that made the nail polish community get to know about Dance Legend polishes.

The formula is good, although I did experience a bit of flooding of the cuticles. Whether this was my own fault or if it was the polish - I don’t know for sure. But I think it was me. It’s the only time I’ve experienced that with a Dance Legend. Pigmentation was good though; it was almost opaque after the first layer. I gave it two to make it look perfect. Drying time in between coats was good!

Girls! I’m I love with this. Take a look at what two coats and no topcoat looks like:


It’s amazingly beautiful!


And the rainbows are almost hypnotizing. Wow is the only word that springs to mind! And doubleplusgood isn’t a real word, so that doesn’t count, haha...


I did a reversed glitter gradient on it. I used a glitter from Jordana called “Celestial”, which is a green multisized glitter in a clear base. It’s the first time I use it, but definitely not the last. I sealed it all up with a layer of topcoat, and here’s my final mani:


The pictures are taken in direct sunlight, which is why some of the glitters appear black. They’re not black, they’re all light green.


Here’s one last shot just because.


It can’t come as a surprise that I love everything about this. I love the colour and the holo effect, I love the glitter and the way the mani came out as a whole.

Enough about me. What do you think?


Opacity: 9/10
Colour, prettiness: 10/10
Durability: 9/10
Value for money: 8/10
Overall: 9/10
Buy again: Yes!

Thursday, December 26, 2013

Dance Legend Shining Rainbow ~ #11 Red


Dance Legend Shining Rainbow ~ #11 Red
“Red” scattered holographic

Dance Legend’s Shining Rainbow collection is from a while before they became really popular outside Russia. It’s a series of scattered holographics, and some of them are really nice.

The formula of #11 is the same as in the other Shining Rainbow polishes I’ve tried. It’s easy to work with, doesn’t require an aqua base, it covers well in two coats and drying time is a bit faster than average. That’s adds up to Pretty Good, I think.

Here’s what #11 looks like in direct sunshine. Two coats, no topcoat:


And a shot from a different angle:


It looks pretty cool, don’t you think? Did you wonder why I wrote “red” in quotation marks in the headline? It’s because this is red with pink – not a true red. And that’s a shame, because I don’t like it as much out of the sun - ugh! Let me show you what I’m talking about. Here’s a daylight pic, out of the sunshine:


See? It isn’t as nice, is it? I don’t think so, anyway. But I stamped on it nontheless. I used XL stamping plate H and stamped with a black no name stamping polish. I sealed the whole thing with a layer of topcoat, and here’s my final mani:


I like this a lot. The stamp doesn’t overwhelm the holo effect!


Last shot: 


It’s a shame that this isn’t as pretty in the shadow, but I think I can live with it in this case. <said the girl who didn’t want to get rid of too many holos, haha!)

Opacity: 7/10
Colour, prettiness: 6/10
Durability: 8/10
Value for money: 8/10
Overall: 7/10
Buy again: No, I don’t think so

Wednesday, December 25, 2013

My Christmas mani 2013


China Glaze ~ Mommy Kissing Santa
Deep shimmery red
&
Essie ~Shine of the Times
Orange/red/green dense flakie

Let me show you the mani I wore yesterday on Christmas eve. I knew I wanted to wear red – I love red, and I think it’s perfect for Christmas. And I knew I wanted to wear the Essie “Shine of the Times” that my boyfriend gave to me as a gift this Sunday. So here it is!

I applied two layers of Mommy Kissing Santa on all my nails. Application was good, coverage too and drying time as well.

Then I applied one single layer of Shine of the Times on my pinkie and my pointer. And man, that flakie is insanely dense, I don’t think I’ve seen anything quite like it! The colour shift is absolutely beautiful, from red over orange to green!


I also wanted to stamp! I chose two difference snow flake designs from the XL stamping plate K, and a heart design from the stamping plate QA45. I stamped with Essies “Penny Talk”; a lovely coppery metallic. A layer of topcoat completed the mani.
When I twist my fingers like this, you can see how wild the green is in the flakie.


I chose to stamp with copper because I thought it would match the flakie pretty well, and I honestly think it works!


On my pinkie you can see when the flakies show off their red side. Beautiful!


Yes, I was satisfied with this, very satisfied!
I hope you had a wonderful Christmas evening! Merry Christmas to you all! ♥


Mommy Kissing Santa
Number of coats: 2
Drying time: Fast
Durability: Good
Removal: No problems
Overall impression: It’s a beautiful and vampy red
Buy again: Yes

Shine of the times
Number of coats: 1
Drying time: Average
Durability: Good
Removal: No problems
Overall impression: Amazingly dense flakie, wow!
Buy again: Yes

Tuesday, December 24, 2013

Butter London ~ Chancer


Butter London ~ Chancer
Red jelly with red microglitter

Last time I was in Germany I was so lucky to find Butter London’s on special! How often does that happen, eh? :D I was thrilled! I threw Chancer (and a couple of others) in my cart, paid and left happy as a bunny.

Chancer is related to lots of polishes all called something to do with ruby footwear. But Chancer is in a league of her own. The formula is fantastic, the drying time is good and the pigmentation is really cool for a jelly. Two coats is what it took to make this look good. No dragging, no bald spots or thinner areas, just perfection coming right out of the bottle.

I’ve got new photo lamps – these are my first pictures taken in the light of them, and I am thrilled! Hooray!!
<Ahem, moving right on>
Here’s a picture of two coats and one coat of topcoat:


Isn’t that just beautiful? I love it!


I decided that I wanted to try and make it look even more beautiful with some simple nail art. I grabbed a black striper from Claire’s and a silver glitter striper from NYX. I made three stripes with each colour on each nail, in three different lengths. I finished the mani off with a layer of Poshé topcoat, and here’s what it ended up looking!


Isn’t it just beautiful! (Note that I didn’t end that sentence with a question mark, this time, haha!)


It was really hard to stop taking photos of it!


This is the last shot, I promise! It’s just to show you the depth of it!


And here are the polishes I used:

  
I only have positive words to say about this polish. The quality is fantastic, it’s so much better than it’s ruby footwear sisters, I can’t even describe how much I like this. I might even get rid of some of the sisters now - yikes!

The only negative thing I can come up with about this polish is the cap. I don’t like the stupid little ridged handle I end up with using when I’ve pulled the big square cap off. But that’s a matter of taste, I think. I would have preferred a bigger and non-ridged handle for sure!

So – what is your verdict, girls? Do you also like the look of this?


Opacity: 8/10
Colour, prettiness: 10/10
Durability: 8/10
Value for money: 9/10
Overall: 9/10
Buy again: Yes

Monday, December 23, 2013

The Nightmare before Christmas ~ Sally & Jack


The Nightmare before Christmas ~ Sally & Jack  
Black with multicoloured miniglitter and red jelly with red and pink miniglitter

'Twas a long time ago, longer now than it seems
in a place perhaps you've seen in your dreams.
For the story you're about to be told
began with the holiday worlds of auld.
Now you've probably wondered where holidays come from.
If you haven't I'd say it's time you begun.

This is a quote from Tim Burton’s ‘A Nightmare before Christmas’; one of my favourite Christmas movies. I was thrilled to find Sally and Jack polishes in Hot Topic in New York! I almost made a mistake only buying Sally though: I’m a sucker for glittery red and I don’t wear black very often. But Jack and Sally belong together, so I ended up bringing them both home. And I’m glad that I did.

I applied two coats of each polish. The polishes are equally easy to apply and it takes two coats to make them look at their best. Drying time is on the slow side, and their smell is a bit odd, but I can easily live with that because the polishes are both dead gorgeous.

Let me show you two coats of Jack and two coats of Sally, all with a layer of Poshé topcoat on:


See what I mean? I love that there’s multicoloured glitter in the black, and the red looks really great with the pink and red glitters too.


Here’s the pretty couple:


Allow me to make them even prettier. I painted white stripes on my pinkie to represent Jack’s stripy jacket. The ring and the middle finger got a kiss and a couple of hearts on them – Sally is so sweet <3 My pointer had Jack stamped on it, and the thumb had a layer of L A Girls “Uninhibited” black glitter over it.
I found the stamps on these plates:
Lips: Bundlemonster BM-02
Hearts: Unnamed Essence stamping plate
Jack: XL stamping plate K Holiday designs
I stamped with a no name black stamping polish.

I applied another layer of Poshé topcoat, and here’s my final mani:


I really like this, it turned out just the way I wanted it to!


One last shot, just because I can:


Like I said: This is what I wanted it to look like. Perfect for Christmas and as a tribute to a Christmas movie that I really like to watch.

Have you seen The Nightmare before Christmas? If yes, did you like it?